
Getting reliable electrical connections really starts with a good, repeatable crimp. That’s where a manual crimping tool comes in handy for technicians. It gives you direct feedback while you’re squeezing—kind of like feeling how much resistance there is as the terminal clamps down on the wire. It makes it way easier to tell if everything’s good, spot issues, and do it all over again if needed.
When you’re out in the field, the little details actually matter a lot. For example, you want to make sure the die you’re using matches the terminal and the wire gauge. The conductor should sit completely inside the barrel. With steady, consistent pressure, the tool creates a solid mechanical connection—no batteries, no software, no compressed air needed. Plus, experienced installers often double-check their work by inspecting the crimp for proper compression, ensuring the conductor is properly placed, and that there’s no damage to the insulation. That quick visual check might save you from loose wires hiding inside a cramped control panel later on.
Manual tools are super practical for maintenance crews, workshops, or when you’re doing a few installs here and there. They’re especially useful if you don’t have power nearby. Plus, they cut down on setup time for those occasional repairs. But hey, they’re not perfect. Hand strength can vary from person to person, and rushing through a crimp can lead to inconsistent results. That’s something to pay attention to—don’t ignore it. Regular practice, calibration of your tools, and maybe even doing some sample tests can help you improve your confidence.
Of course, it’s important to follow the manufacturer’s instructions and stick to recognized electrical standards when you’re working. If you really want to be sure, independent testing guidelines can add that extra layer of trust, especially when a solid connection is critical. Remember, a good tool isn’t a substitute for skill—it’s there to support your technique. So, picking the right manual crimper means balancing comfort, die accuracy, compatibility with terminals, and good inspection habits. It’s simple in theory, but definitely takes some practice to master.
What Is a Manual Crimping Tool?
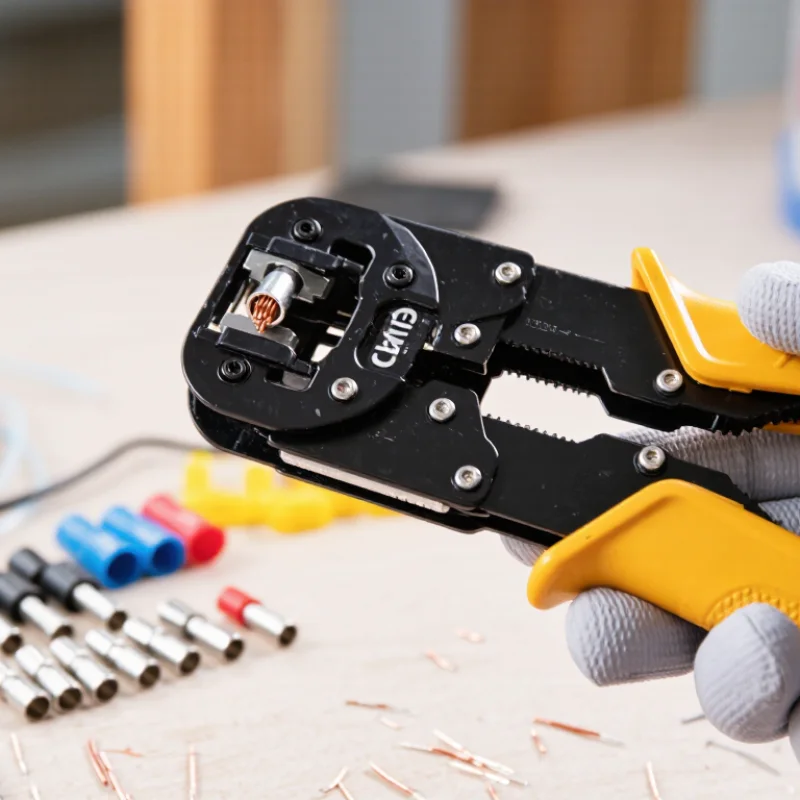
A manual crimping tool is a hand-operated device that joins a connector to the end of a wire. It uses controlled pressure to shape a metal terminal around the conductor. No electricity, battery, or compressed air is required. The tool usually has shaped crimping jaws, insulated handles, and a locking mechanism. Some models include cutters or wire strippers.
In practical work, the correct terminal matters as much as the tool. I first match the terminal size with the wire gauge, then strip only the required insulation length. The exposed strands should fit inside the terminal without bending outward. After positioning the terminal, I squeeze the handles firmly until the crimp is formed. A secure connection should not pull apart with moderate hand force. It should also show even compression, not deep cuts or loose edges.
A crimping tool kit can help when several terminal sizes are needed. I have occasionally chosen a terminal by appearance and had to redo the connection. That mistake is easy to make. A crimp that looks neat may still be electrically weak. For dependable results, I inspect the wire entry, test the connection gently, and check for exposed copper near the insulation. Manual tools offer excellent control, but they depend on steady pressure and proper alignment. Hands get tired. Periodic inspection remains necessary.
How Manual Crimping Tools Create Secure Connections
A manual crimping tool creates a secure connection through controlled pressure, not guesswork. Its shaped die compresses a terminal around the stripped conductor. This forms a tight mechanical grip and a stable electrical path. The connection should hold firmly before insulation is added.
In practical wiring work, preparation matters as much as squeezing. Match the terminal to the wire size. Strip only the required length. Exposed copper should fit completely inside the barrel. Keep the conductor clean and straight. Place the terminal squarely in the correct die cavity. Then close the handles fully until the ratchet releases. Do not stop halfway.
Check the result carefully. The crimp should look even, without cracks, loose strands, or excessive distortion. A gentle pull test can reveal movement that looks invisible. I have seen neat-looking crimps fail because the insulation entered the barrel too far. Small errors matter.
Manual tools also provide useful feedback through hand pressure. Still, they are not foolproof. Repeated work can cause fatigue, and tired hands may reduce crimp consistency. Clean dies and regular inspection help. When reliability is critical, verify the wire size, terminal type, and finished pull strength against appropriate technical requirements. A secure connection begins with a careful process.
Why Choose a Manual Crimping Tool for Reliable Connections?
A secure manual crimp starts with selecting a terminal that matches the conductor size. The chart shows the nominal cross-sectional area of common AWG copper conductors, helping illustrate why correct size matching matters for consistent mechanical and electrical connections.
| Category | Nominal Copper Conductor Area (mm²) |
|---|---|
| 24 AWG | 0.205 |
| 20 AWG | 0.519 |
| 16 AWG | 1.31 |
| 12 AWG | 3.31 |
| 10 AWG | 5.26 |
Key takeaway: Using the correct conductor and terminal size allows a manual crimping tool to compress the connection firmly, helping reduce looseness, increased resistance, and accidental pullout.
Key Advantages of Manual Crimping for Reliability
Why Choose a Manual crimping tool for Reliable Connections?
Key Advantages of Manual Crimping for Reliability
A manual crimping tool gives technicians direct control over each connection. Its simple mechanism requires no battery, software, or compressed air. That reduces possible failure points during installation and maintenance. In field work, this matters when power is unavailable or conditions are unpredictable. The tool also provides immediate physical feedback during compression. A properly formed crimp usually feels firm and consistent in the hand.
Repeatable pressure is one of the main advantages of manual crimping. A correctly matched die shapes the terminal around the conductor without excessive deformation. This supports stable electrical performance and better resistance to vibration. Technicians can inspect the terminal, conductor position, and insulation support before moving on. Small details often determine long-term reliability. I have found that clean stripping and full conductor insertion prevent more problems than extra force.
Manual tools are also easy to maintain. Regular cleaning, pivot lubrication, and die inspection help preserve accurate movement. However, no crimping tool removes the need for training. Hand fatigue can affect pressure, especially during repetitive work. That weakness is easy to overlook. Periodic checks with a pull test or visual inspection can reveal loose strands, uneven compression, or damaged insulation. Crimp specifications should always come from the terminal and wire manufacturer. Improvising can create a connection that looks acceptable but performs poorly later.
Choosing the Right Tool, Terminal, and Wire
A manual crimping tool can produce reliable connections when its size matches the terminal and wire.
In practical wiring work, I check the conductor diameter before touching the tool. A terminal should fit the wire snugly, without forcing extra strands inside. Loose strands can weaken the joint and create uneven pressure.
The terminal material also matters. Choose a terminal designed for the wire type and the expected electrical load. Insulated terminals need a crimping tool with the correct cavity shape. Uninsulated terminals require controlled pressure and careful positioning. Place the terminal fully into the die, then insert the stripped wire until the conductor reaches the metal barrel. Do not strip too much insulation. Exposed copper invites bending, moisture, and accidental contact.
A proper crimp should hold firmly without cutting through the terminal. I usually perform a gentle pull test by hand. It is not a laboratory measurement, but it can reveal a weak connection quickly. Inspect the crimp from several angles. Uneven compression often signals the wrong die or poor alignment. Small details matter.
Manual tools also reveal mistakes through hand pressure. That feedback is useful, although it can be misleading when fatigue sets in. I once accepted a neat-looking crimp that later needed rework because the wire had not reached the barrel. Slow down. Measure twice. A reliable connection depends on the tool, terminal, and wire working as one system.
Step-by-Step Guide to Making a Reliable Crimp
A reliable crimp begins with the correct terminal, wire size, and a clean manual crimping tool. Check the terminal specifications before cutting the wire. The conductor should fit smoothly, not loosely. Strip only the required length, and avoid nicking the copper strands. Small damage can weaken the connection later. Keep it steady.
Slide the wire into the terminal until the insulation reaches the support area. The bare conductor must remain inside the metal barrel. Place the barrel in the matching die cavity of the wire crimping tool. The terminal should sit straight, not at an angle. Squeeze the handles firmly until the crimp is fully formed. Do not crush the terminal beyond its marked shape. I sometimes pause here to check alignment, because rushing creates faults that look acceptable at first.
Inspect both sides of the crimp under bright light. The conductor should be visible through the inspection window, if one exists. Gently pull the wire by hand; it should not move inside the terminal. For critical work, follow the specified pull-test method and use a calibrated tool. A loose strand, cracked barrel, or uneven indentation means starting again with a new terminal. I have learned that reusing a distorted terminal is rarely worth the time saved. Record the wire size and tool setting when consistency matters.
Common Crimping Errors and How to Prevent Them
A manual crimping tool can produce reliable connections when the operator controls each step. In field work, I have seen loose terminals caused by rushed preparation, not poor equipment. A wire crimping tool kit helps keep cutters, strippers, terminals, and gauges together. Still, a complete kit cannot correct careless technique.
A common error is stripping too much insulation. Exposed copper may touch nearby conductors and create a fault. Strip only the length specified for the terminal. Another mistake is using the wrong terminal size. The wire should enter smoothly, without excessive force. Copper strands must remain together. Twisting them tightly can weaken the crimp.
Do not place the terminal in the wrong die cavity. The crimp may look neat but hold poorly. Close the handles fully until the tool releases, when its design includes a controlled cycle. Then inspect the barrel for even compression. Perform a firm pull test by hand. It should not slide or separate. A magnifying glass can reveal cut strands or cracked insulation.
Clean contact surfaces matter. Oil and debris can affect insertion and inspection. I sometimes find that bright lighting exposes errors missed during a quick check. That extra inspection takes seconds. It prevents rework later. However, hand pressure is not a substitute for the correct die. When a connection fails, record the wire size, terminal type, and crimp condition before repeating the same method.
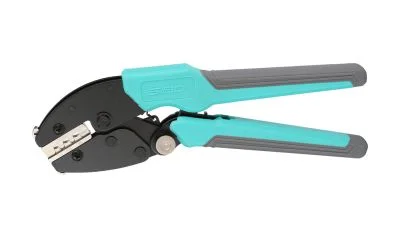
Professional Ratchet Crimping Tool SO-2546B for Solar Connectors: Features, Applications, and Supplier Guide
As global photovoltaic deployment accelerates, dependable installation tools are becoming increasingly important. The *IRENA Renewable Capacity Statistics 2025* reported that solar power added approximately 452 GW of capacity worldwide in 2024, highlighting the growing need for efficient and consistent field equipment. The SO-2546B Pro professional ratchet crimping tool is engineered for solar connectors, including widely used 4 mm photovoltaic connector systems, helping installers create secure electrical connections between solar cables and terminals.
Designed for repeated professional use, the SO-2546B Pro combines controlled ratchet operation with precision crimping geometry. Its mechanism helps ensure that each terminal is compressed evenly, reducing the risk of loose connections, excessive resistance, and premature maintenance. The tool is suitable for photovoltaic module installation, cable assembly, system repairs, and routine servicing. Its durable construction also supports demanding work environments where reliability and operator efficiency are essential.
The *IEA PVPS Trends in Photovoltaic Applications 2024* noted that global photovoltaic capacity exceeded 2.2 TW by the end of 2023, reflecting the expanding scale of solar infrastructure. For contractors, distributors, and maintenance teams, sourcing the SO-2546B Pro from an experienced Chinese factory provides access to consistent manufacturing, durable materials, and scalable supply support. It is a practical choice for professional solar projects requiring repeatable crimp quality and dependable long-term performance.
FAQS
Why can a manual crimping tool improve connection reliability?
It gives technicians direct control over each connection. No battery, software, or compressed air is needed. The handles provide immediate physical feedback. That simplicity reduces possible failure points.
How should I choose the correct tool and terminal?
Match the tool, die, terminal, and wire size. The conductor should fit snugly without forcing extra strands inside. Insulated and uninsulated terminals may require different die shapes. Check the terminal specifications carefully.
How much insulation should I remove from the wire?
Strip only the required length. The bare conductor must stay inside the metal barrel. Avoid nicking copper strands. Exposed copper can bend, collect moisture, or touch nearby parts.
How do I position the wire before crimping?
Slide the wire into the terminal until the insulation reaches its support area. Keep the terminal straight inside the matching die cavity. If an inspection window exists, the conductor should be visible. Small alignment errors matter.
What does a properly formed crimp look and feel like?
It should hold firmly without cutting through the terminal. Compression should appear even from several angles. The wire should not move during a gentle pull test. It usually feels firm and consistent.
What checks should I perform after crimping?
Inspect the barrel, conductor position, insulation support, and terminal shape. Use bright light to find loose strands or cracks. For critical work, follow the specified pull-test method. Visual checks alone can miss weaknesses.
How can fatigue affect manual crimping quality?
Repetitive work can reduce hand pressure and concentration. A neat crimp may still contain a hidden positioning error. I once accepted one that needed rework later. Short breaks and periodic checks help.
How should I maintain a manual crimping tool?
Clean the tool regularly and lubricate its pivot when appropriate. Inspect the die cavities for wear or damage. Store the tool away from dirt and moisture. Maintenance helps, but it cannot replace training.
Conclusion
A Manual Crimping Tool is a hand-operated device used to join wires and terminals by compressing them into a firm electrical and mechanical connection. Unlike temporary twisting or loose fastening, proper crimping forms the terminal around the conductor, helping maintain stable current flow and reducing the risk of separation caused by vibration, movement, or normal use. Its simple design also allows users to control the process directly without relying on powered equipment.
Reliable results depend on choosing a tool that matches the terminal type, wire size, and required crimp profile. The wire should be stripped to the correct length, inserted fully into the terminal, and positioned correctly before applying steady pressure until the crimp is complete. Users should then inspect the connection for secure compression, exposed strands, damage, or movement. Common errors include using mismatched components, over-crimping, under-crimping, and placing the wire incorrectly. Careful preparation and consistent technique make manual crimping a practical method for creating dependable connections.