
Picking the right Crimping Die? Yeah, it really can make or break your connection strength, repeatability, and overall production efficiency. A die might seem like a perfect fit when you’re testing it on the bench—but after enough cycles, it can start to fail. And honestly, even tiny differences in terminal shape, conductor size, or material can end up changing the final result.
So, this guide walks you through seven practical tips for picking out a crimping die—with a lot more confidence. We’re talking about things like terminal geometry, wire range, crimp profile, tooling compatibility, and whatever the manufacturer says you should use. Those details really matter when a connection has to hold up to vibration, heat, moisture, and everyday handling. And seasoned techs don’t just go by looks—they check crimp height, pull force, and visible deformation too.
Bottom line? The little details are what decide performance.
If you want a choice you can actually rely on, start with solid, verified application data. Check the terminal part number, conductor type, insulation diameter, and the crimp dimensions you need. From there, match those details against the tech docs from a supplier you trust—think Phoenix Contact, TE Connectivity, or Molex. Running a controlled sample crimp can catch issues before you go into full production. That said, no selection process is ever foolproof. Operators can miss things like worn jaws, uneven stripping, or wire that’s not positioned quite right. So yeah—that’s exactly why you can’t skip regular inspections and measurements. They still matter.
These tips are really for engineers, assemblers, and quality folks. Think of them as a way to make smarter calls, not just take wild guesses. Use them like a practical checklist, and if someone gives you a recommendation without test evidence? Push back. Ask questions.
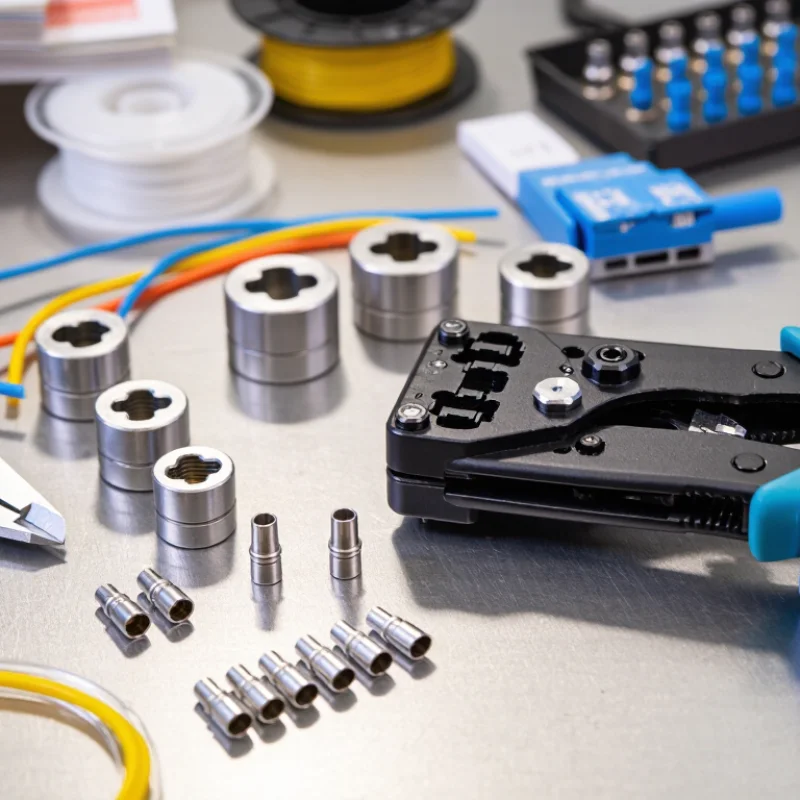
Understanding Crimping Dies and Their Main Applications
Crimping dies shape a terminal around a conductor, creating a controlled mechanical and electrical connection. The right die depends on terminal material, wire size, insulation diameter, and crimp profile. A Die Crimper for copper terminals may not suit aluminum or sealed connectors. Check the manufacturer’s dimensional chart, not only the tool’s advertised range.
Industry demand makes this choice more important. Grand View Research estimated the global electrical connectors market at about USD 84.8 billion in 2023, with continued growth through 2030. This expansion reflects wider use in vehicles, industrial controls, renewable-energy equipment, and data systems. For each application, match the die to the terminal barrel. Open-barrel terminals need different geometry from closed-barrel terminals. Coaxial connectors also require precise multi-stage forming.
Seven practical checks help: confirm wire gauge, verify terminal compatibility, inspect the crimp height, select the correct profile, assess required force, check tool calibration, and test sample connections. The crimp should hold firmly without cutting strands. Look closely.
In field work, a slightly oversized die can leave visible gaps and increase resistance. A die that is too small may damage insulation or split the terminal. Professional test reports commonly emphasize pull-force testing and cross-section inspection for quality control. Still, catalog data is not perfect. I have seen similar terminals behave differently after plating, vibration, or temperature cycling. A sample crimp, measured and inspected before production, remains the safer decision.
Matching Die Size to Wire, Terminal, and Connector Specifications
Choosing a crimping die starts with the wire, not the tool.
Verify conductor size in mm² or AWG, then check the terminal manufacturer’s approved range. A die marked 1.5 mm² may still fail if the terminal barrel accepts only 1.0–1.25 mm². Measure the stripped conductor with calipers. Do not include insulation.
IEC 60352-2:2024
evaluates crimped connections through mechanical, electrical, and environmental tests. Its guidance links pull-out performance to conductor size, crimp geometry, and material condition. IPC/WHMA-A-620E also stresses correct conductor brush length, insulation support, and visible deformation. These details matter inside tight connector cavities. A barrel can look neat while producing excessive resistance.
Match the die to the terminal’s specified crimp zone, not merely its outside diameter.
Check conductor barrel width, insulation diameter, contact material, and connector cavity clearance. I once trusted wire size alone. That was a mistake. Two cables with the same area can have different strand counts and insulation thicknesses. Use a cross-section check during validation. Record crimp height, width, and pull-test results. IEC 60352-2:2024 provides test methods, while IPC/WHMA-A-620E defines workmanship expectations. Die markings can be unclear. Confirm them against the terminal data sheet before production. A small mismatch may create a loose connection, damaged strands, or an oversized profile that will not enter the connector.
Selecting the Right Die Material and Construction Quality
Choosing a crimping die starts with material, not appearance. Hardened tool steel usually provides strong wear resistance and stable geometry. Carbide inserts suit high-volume production but may chip after impact. A polished surface can mislead. It does not prove accurate construction. In bench checks, inspect the die cavity under magnification. Look for sharp edges, uneven polishing, and poor alignment. The IPC/WHMA-A-620 standard stresses controlled crimp geometry, conductor compression, and visual acceptance. These checks support repeatable electrical and mechanical performance.
Tip 1: Match the die material to workload. For occasional repairs, hardened steel may offer better value. For continuous cycles, choose a die with documented hardness, heat treatment, and coating data. Tip 2: Verify dimensional tolerance. A ±0.01mm Precision Die Crimper sounds impressive, but ask how the figure was measured. Was it tested across the full cavity, or only at one point? ISO/IEC 17025 guidance supports using calibrated equipment and traceable measurements. That detail matters more than advertising language.
Tip 3: Examine construction quality. The die halves should close evenly, without visible gaps or lateral movement. A robust hinge reduces misalignment during repeated compression. Ask for cycle-test results, material certificates, and inspection records. The 2023 IPC/WHMA-A-620 revision remains useful for workmanship evaluation, yet it does not replace application testing. I would also test pull force, conductor damage, and contact resistance on actual cable samples. My first selection may still be wrong. Real wire sizes, plating, and operator technique can change the result.
Checking Crimp Profile, Compatibility, and Required Standards
7 Tips to Choose the Right Crimping Die
Checking Crimp Profile, Compatibility, and Required Standards
A suitable crimping die begins with the terminal’s required crimp profile. Open-barrel terminals may need an “F” crimp, while closed terminals require a different cavity shape. Examine the conductor wings, insulation support, and finished height. The crimp should hold firmly without cutting strands or splitting the barrel. Small details matter.
Check compatibility before placing the die in a Crimping Press. Confirm the press tonnage, die mounting system, terminal range, wire cross-section, and indexing method. A die designed for one material may deform another. Copper, aluminum, and plated terminals can respond differently under pressure. Keep the manufacturer’s dimensional chart nearby, and measure sample crimps with a calibrated micrometer. Visual inspection alone is not enough.
Required standards should guide the final decision. Review the applicable terminal specification, industry standard, and customer acceptance criteria before production. Pull-force testing can reveal weak compression, while a cross-section inspection can expose voids, cracked strands, or uneven wings. Record the die number, adjustment setting, wire size, and test results for traceability. In practice, the first die choice is not always correct. I have seen a clean-looking crimp fail after vibration testing. That mistake is useful, but expensive. Recheck the profile after die wear, material changes, or press maintenance. Calibration records should be current. Then verify again.
Evaluating Tool Type, Pressure, and Ease of Operation
Tip 1:
Match the tool type to the connector and cable material. Manual, hydraulic, and battery-powered tools produce different working experiences. Manual tools suit light tasks and occasional repairs. Hydraulic tools reduce hand strain during repeated crimping. Confirm the die profile, cable range, and connector specification before buying. A close fit is not enough.
Tip 2:
Evaluate pressure control, not just maximum force. A high-rated tool may still produce uneven crimps if pressure is poorly controlled. Look for clear pressure indicators, a release mechanism, and stable die movement. In practical testing, place a terminal on a short cable sample first. Inspect the indentation, conductor position, and terminal deformation. It should look consistent. Not merely tight.
Tip 3:
Test ease of operation with gloves and limited workspace. Check handle reach, opening angle, weight, and whether the die changes quickly. A comfortable grip matters when several connections are required. Good alignment also reduces wasted material. I have found that product descriptions often overlook hand fatigue. That detail deserves more attention. A tool can meet technical requirements yet feel awkward after ten crimps. Record your trial results, including pressure settings and visible defects. This creates a useful reference for future work and helps prevent repeated mistakes.
Comparing Durability, Maintenance Needs, and Replacement Options
7 Tips to Choose the Right Crimping Die
Comparing Durability, Maintenance Needs, and Replacement Options
A reliable crimping die should withstand repeated pressure without losing its shape. Check the material, surface hardness, and edge alignment before purchasing. These details often reveal more than a polished product description. In field work, I inspect the die after several cycles for dents, spreading, or uneven impressions. Small defects can create loose connections later.
Maintenance needs also affect long-term value. Choose a die with smooth surfaces and accessible contact areas. Remove metal dust after use with a dry brush or lint-free cloth. Apply a suitable light lubricant only where the manufacturer permits it. Too much oil attracts grit. Store the die in a dry case, preferably inside a crimping tool kit with separated compartments. That simple habit prevents scratches and accidental mixing.
Replacement options deserve equal attention. Confirm whether individual die inserts are available instead of replacing the complete tool. Ask about size markings, compatibility, and expected delivery times. A common profile may be easier to replace than a specialized one. I once selected a durable die without checking replacement availability. The decision seemed economical, but downtime proved otherwise. Review the warranty terms and inspection guidance carefully. They are not exciting details. They can determine whether the tool remains dependable after years of regular use.
Testing the Crimp Result Before Making a Final Choice
Choosing a crimping die should begin with evidence, not appearance. Test the crimp result before making a final choice. Use the exact terminal, conductor size, and insulation type used in production. Prepare three clean samples. A single sample can mislead you.
Check the crimp height with a calibrated micrometer. Measure the width at the center, not near the edge. Inspect the conductor strands for cuts, gaps, or excessive compression. Bend each sample gently and watch for movement. Perform a controlled pull test using suitable equipment. Record the peak force and compare all three results. Cut one crimp through its center. The cross-section should show even strand compression without large voids.
Look for a firm bell mouth at the conductor entry. Confirm that the insulation support grips without damaging the jacket. Test the die at the lowest and highest allowed wire sizes. Repeat the process after several cycles, because heat and wear can change the result. Keep photographs, measurements, and test conditions in one record. This supports reliable decisions and later quality checks.
My first trial once looked excellent but failed after repeated flexing. The problem was hidden beneath the insulation support. Visual inspection alone was not enough. A polished crimp can still be weak. If results vary widely, stop and investigate the tool, material, or setup. Do not select a die until the evidence remains consistent across samples.
7 Tips to Choose the Right Crimping Die
Testing the crimp result before making a final choice
| Category | Passing crimps out of 30 (%) |
|---|---|
| Profile A | 73 |
| Profile B | 80 |
| Profile C | 87 |
| Profile D | 93 |
| Profile E | 83 |
| Profile F | 70 |
| Profile G | 77 |
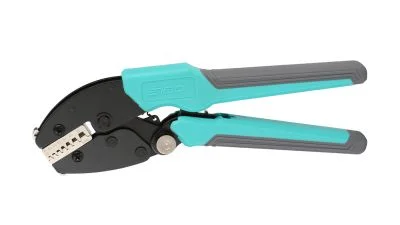
China Ratchet Crimping Tools SO-10WF Pro: Reliable Crimping for Insulated and Non-Insulated Ferrules
The China Ratchet Crimping Tool SO-10WF Pro is designed for reliable crimping of both insulated and non-insulated ferrules. Its ratchet mechanism supports consistent compression, helping create secure electrical connections with less effort and improved control. Suitable for maintenance work, control cabinets, wiring projects, and industrial assembly, the tool is built to handle repeated use while providing a comfortable operating experience.
To complement the SO-10WF Pro, our factory supplies premium insulated and non-insulated ferrules manufactured with careful attention to dimensional accuracy and material quality. These ferrules are available in a variety of sizes to accommodate different wire specifications and application requirements. Insulated options help support organized, protected terminations, while non-insulated ferrules provide a practical choice for applications where compact connections and flexible installation are important.
As a direct manufacturer in China, we maintain strict production and inspection procedures throughout the manufacturing process. Advanced equipment and skilled technicians help ensure dependable performance, consistent crimping results, and long service life. Combining the SO-10WF Pro with properly matched ferrules provides an efficient solution for professionals seeking stable, precise, and durable wire terminations across a wide range of industrial applications.
FAQS
What should I check before selecting a crimping die?
Measure the stripped conductor in mm² or AWG. Do not include insulation. Then check the terminal’s approved conductor range.
Can two wires with the same area need different dies?
Yes. Strand count, insulation thickness, and terminal design can differ. A matching area alone may not ensure a reliable crimp.
How can I confirm the wire size accurately?
Use calipers on the stripped conductor. Compare the measurement with the terminal data sheet. A cross-section check can reveal hidden differences.
Should the die match the terminal’s outside diameter?
Not necessarily. Match the die to the specified crimp zone, conductor barrel width, insulation support, and connector cavity.
What problems can a poorly matched die create?
It may loosen the connection, damage strands, increase resistance, or create a profile that cannot enter the connector.
Which die material suits occasional repair work?
Hardened tool steel often suits occasional repairs. It offers good wear resistance without excessive cost. Still, verify its dimensions.
What should I inspect on a die before production?
Examine the cavity under magnification. Look for sharp edges, uneven polishing, gaps, and poor alignment. Small flaws matter.
Does a high force rating guarantee consistent crimps?
No. Pressure control and stable die movement matter more than maximum force alone. Test a short cable sample first.
How can I evaluate a tool’s operating comfort?
Try it with gloves and limited workspace. Check handle reach, weight, opening angle, and die-changing speed.
What test results should I record during validation?
Record crimp height, crimp width, pressure settings, pull force, resistance, and visible defects. My first choice may still be wrong.
Conclusion
Choosing the right Crimping Die is essential for producing secure, consistent, and reliable electrical connections. Start by understanding the die’s intended application, then match its size carefully to the wire gauge, terminal dimensions, and connector specifications. Material quality and construction also matter, as strong, wear-resistant materials can improve service life and maintain accurate crimping performance. Check the required crimp profile and confirm that the die is compatible with both the terminal and the tool, while also meeting applicable technical standards.
Consider the tool type, operating pressure, and ease of use to ensure efficient and comfortable work. A practical die should deliver sufficient force without creating unnecessary strain. Before making a final choice, compare durability, cleaning requirements, maintenance needs, and the availability of replacement parts. Most importantly, test sample crimps and inspect their shape, firmness, and pull resistance. This final evaluation helps confirm that the die performs correctly for the intended application.